A lawnmower can have some difficulties starting. If such kind of problem prevails over, one potential issue could be checked and the issue is an electrical system. If the electric system is fault-free, the problem could occur due to a faulty starter.
There are also a few potential problems including the starter motor, loose wire setting etc. After checking all these probable facts, a bench test of the starter is needed.
It is not that difficult to test a starter but if any problem prevails, it needs to be replaced. This article gives a full overview and direction-wise thoughts about testing a lawnmower starter.
There are some steps below on how to Bench Test a Lawnmower Starter:
Step 1: Collecting necessary tools: jumper cable, wire brush, battery
Step 2: Parking the mower on a flat surface and turn it off.
Step 3: Disconnecting the spark plug cables
Step 4: Removing and cleaning the starter thoroughly including all rust and dust.
Step 5: Connecting the starter with a 12-volt battery using jumper cables
Step 6: Testing the starter. (If the starter functions properly then its head should start spinning when connected to the battery. The fault might be shown if the starter is clicking or stops automatically and needs to be replaced then)
Before judging the starter as a faulty one, some other tests need to be performed to detect the actual problem. Instead of a faulty starter, there are a few other electrical components that hinder a smooth start. Those electrical components and their checking procedures are given below.
Battery: Battery is one of the basic components of a machine. Before troubleshooting, the battery must be checked whether it is properly or fully charged or not.
Electrical connections: Electrical wiring system is also a very important part of an electric system. It is important to make sure whether the wires are not broken or disconnected.
Solenoid: It is also important to check the solenoid as it ensures the flow of electricity to the starter motor.
Lawnmower Battery
It is one of the most important components of a lawnmower electrical system as the battery is responsible for supplying power to the system.
If there is any fault with the battery, no electricity will reach the starter motor and therefore the mower won’t start. To make sure whether the battery is functional, we need to check the battery charge first. The battery needs a sufficient charge to deliver power to the mower.
Most of the engines use a 12 Volt battery. A battery tester can indicate whether the battery needs a charge or not. If the battery is not charged properly, give it an optimum charge to work. If the battery is not functional, it needs to be replaced. It is also important to investigate the battery charge.
A multimeter can measure the battery voltage. If it shows a voltage between 12.7 to 12.9, it remains functional. If the voltage indicates a reading below 12 volts, the battery does not have enough energy which can be solved by replacing only.
Lawnmower Electrical Connections
Electric connection is also a very important part of a lawnmower as it supplies electricity to the whole system.
If the electric connections are loose, broken or corroded, the mower won’t start due to interruption of electric flow. A multimeter is the best option to check the connections at several parts of a mower.
The resistance setting also helps to indicate the proper electric setup. For resistance check, all the connection resistance should remain below 1 Ohm. Higher ohm reflects hindrance in electric flow. By cleaning the wire junctions using a wire brush is an option. It is important to make sure whether all the connections are complete and wires are fresh in condition.
Lawnmower Solenoid
A solenoid is one of the major components that influence the start procedure of a lawnmower. The battery’s voltage pushes the starter solenoid once the ignition key is turned.
It is responsible for the supply of high current that is needed to power up the starter motor. If the solenoid is not functional, the starter motor won’t ignite. There is an indication of identifying a bad solenoid.
It creates a clinking sound upon trying to start. You may require to connect a jumper wire from one large lug to other to a solenoid starter to check. You need to connect the battery cable to the large lug and the engine starter cable to the other one. If the stater motor shuts off, it indicates a faulty solenoid. Only replace will sort the problem out.
After performing the components test, if no problem is detected, the starter check needs to be performed.
Bench Testing a Lawnmower Starter
It is important to follow the step-by-step process to bench test the lawnmower’s starter:
Step 1: Collecting necessary tools
Some tools are a must item for performing bench-testing. Those are:
- A cleaning brush
- A battery
- A jumper cable
Step 2: Parking the mower on a flat surface and turn it off
It is also very important to park the mower to an even surface to check perfectly.
Step 3: Disconnecting the spark plug cables
To keep the test safe and free from any unintentional damage spark plug cable needs to disconnect.
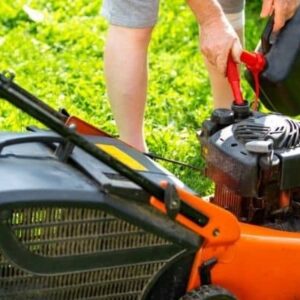
Step 4: Removing and cleaning the starter thoroughly including all rust and dust.
It may sometimes be difficult to locate the starter. The best way to find the starter is to follow the cables from the battery to the solenoid. The starter will just remain after the solenoid. In general, it remains beneath the hood of the mower. It is important to remove the starter from the mower and clean all electrical posts with a wire brush.
Step 5: Connecting the starter with a 12-volt battery using jumper cables
A jumper cable and a 12-volt battery are needed to test the starter. Connect one end of the jumper cable to the battery i.e., the red wire to the negative terminal and the black one to the positive terminal. It is also important to avoid short circuits.
Step 6: Testing the starter
After all the setup, you need to connect the red wire to the starter frame and the black wire to the terminal of the starter terminal. If the starter is functional, the head will start spinning. The rotation will stop or sound click if the starter is faulty. That brings to a summery that the starter needs to be replaced.
Last Updated on March 21, 2023